
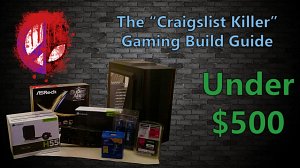
 For starters, this PC build guide has nothing to do with the actual "Craigslist Killer" or anything associated with that for that matter. I was inspired by a series of videos called Scrapyard Wars by Linus Tech Tips. After seeing what they could piece together from Craigslist I decided to set out and build my own "Scrapyard PC" with a different goal in mind. While this build will not be a powerhouse, it will get the job done for under $500, another reason why I like to call this the "Craigslist Killer" gaming rig. (In case you didn't get that joke I was implying someone would go to Craigslist to find a cheap Hitman. It was a stupid joke don't actually look for a Hitman on Craigslist)
The Goal
There are a couple goals that I wanted to achieve with this build.
1.Build a PC better than the Alienware Alpha
2.Must cost less than $500
3.Has to be built with future upgrades in mind
4.Must get some of the parts from Craigslist when possible
Finding parts on Craigslist where I live wasn't easy so I got what I could.
To sum it up, I wanted to build a computer that would bring the Alienware Alpha to its knees, for less money, that could be upgraded beyond the Alphas upgrading capabilities.
The Parts List
Note: Prices may vary from the time this was posted. Click the images to get up to date pricing from Amazon.
CPU:
Intel Pentium G3258 3.2GHz Dual-Core Processor ($69.99 via Newegg)
I went with the Pentium G3258 for two reasons, it's cheap and it's unlocked so it overclock's like nobody's business! Also, it uses the LGA1150 socket type which means I can upgrade to the Devil's Canyon i7-4790K later on down the road.

CPU Cooler:
Corsair H55 Liquid CPU Cooler ($30.00 via Craigslist)
I chose this cooler because it was half of it's normal price on Craigslist and because I will be able to achieve a higher and more stable overclock than I would have been able to with the Intel box cooler.

Motherboard:
ASRock Z97 EXTREME4 ATX LGA1150 Motherboard ($108.99 via Newegg)
While I could have used a cheaper motherboard I chose this one with future upgrades in mind. The Z97 chipset along with 3 PCIe 3.0 x16 slots and CrossFire/SLI make it a good choice. Not to mention I got it cheaper because it was an open box special.

Memory:
G.Skill Ripjaws X Series 16GB (2 x 8GB) DDR3-1866 Memory ($79.99 via Newegg)
Truth be told, I went overboard with the ram. You could go with 1 x 8gb stick of ram and be more than fine. It was a great deal at the time so went ahead and got it. The color also matches the motherboard which is nice.

Storage:
Kingston SSDNow V300 Series 120GB SSD ($47.99 via Newegg)
I chose a lower capacity SSD to put the OS and programs on instead of a high capacity HDD because of speed. It is enough storage for now and I can add a HDD later on if I choose to.

Video Card:
EVGA GeForce GTX 750 Ti 2GB Superclocked W/ ACX Cooling ($50.00 via Craigslist)
I went with this graphics card because it is a good choice for entry to mid level gaming rigs and because I got it dirt cheap on craigslist. This is something that I definitely plan on upgrading but it will definitely do for the time being.

Case:
Azza Cosmas ATX Mid Tower Case ($14.99 via Newegg)
After the mail-in-rebate this case only cost me $14.99. It looks great with a nice window to display the guts of your gaming rig. The cons of this case are no front panel USB 3.0 slots and the metal is thin (In fact, I left a small dent in the back panel while building the PC).

Power Supply:
Corsair Builder 500W 80+ Bronze ($24.99 via Newegg)
This power supply was a no-brainer due to it's cost. It was only $24.99 after mail-in-rebate. A modular power supply would have been nice but I was trying to keep the cost low.

Total Cost: $426.94
The Build
This was my first full PC build. I have upgraded computers in the past but never from scratch. Having said that, I would say that this build went as smooth as possible.
Since Plugging all of the components into the motherboard is almost as simple as Legos, I will only cover the problems I ran into in the form of tips and suggestions.
Tip 1: Make sure to make a bootable copy of Windows or whatever OS you decide to use on a USB flash drive and have the OS product key ready.
Tip 2: Before you start, copy the LAN drivers from the motherboard drivers CD onto a flash-drive before you start the build, especially if you don't plan on including an optical drive. This will allow you to connect to the internet and download the latest divers from the motherboard manufacturers website. You could just download the new drivers from the site to your USB flash drive ahead of time as well.
Visualize where the components will be placed that way when you go to put everything in the case you have a plan and will already know where you want things to go. It's always smart to build the computer outside of the box first. The best place to place the motherboard is on the box it came in. And as always use an anti-static wrist strap clipped to a power supply that is plugged in BUT NOT ON. As an extra safety precaution I used an anti-static mat to build the computer on. $15 for a mat and wrist strap is better than wasting hundreds of dollars on destroyed parts.
When all of your parts are plugged into the motherboard (including a monitor, mouse, and keyboard), turn the pc on, in this case using the power button on the motherboard and see if your new PC posts. If it doesn't consult the motherboard booklet for the specific error that you are receiving (having a motherboard that displays the error code like this one is super nice for troubleshooting).
My PC didn't boot at first, but I was able to determine that the video card was to blame. Well, I think it was the video card, because when I removed it and tried it again it worked perfectly. This wasn't a big deal because I was able to just put it back in later.
When your PC boots press the F2 or Del key to enter the bios. From there click the boot tab, change the USB flash drive with the OS on it to the first position so that the PC boots from the USB flash drive and then hit Save & Exit. This will start the operating system installation. When prompted select the SSD to install windows on. From there insert your product key and let windows do it's thing.
The last thing left to do is to activate you operating system. To activate, open System by clicking the Start button, click Control Panel, click System and Maintenance, and then click System. Then under Windows activation, you can view your activation status. You can also change your product key by clicking Change product key. I have always preferred to activate by phone but that is up to you.
After that you are all set.
Intel Pentium G3258 Overclocking & Benchmarks
Because there is a lot to go over with overclocking the Pentium G3258 I will make a separate post where I will discuss just how far you can push this little monster of a CPU. I highly recommend checking out this rigs performance versus the Alienware Alpha benchmarks.
What I will say is that the temperature of my stable overclock and what this setup was able to achieve was extremely surprising.
Conclusion
I set out to build a gaming computer that would bring my Alienware Alpha to an end for under $500 dollars and I did just that. I'm calling this rig the "Craigslist Killer" because some of it's parts are from Craigslist and it has officially killed the Alienware Alpha as far as I am concerned. Most of you are probably thinking the two PC's can't be compared because of the Alpha's small form factor compared to the Craigslist Killer's ATX mid form factor. I get that and for what it's worth the Alpha offers a lot of performance given how small it is and I applaud Alienware for that.
The upgrades that you can do to the Alpha are limited while the upgrades for "Craigslist Killer" are nearly limitless. That fact, along with it's increased performance over the Alpha is why I believe this is a great under $500 gaming rig. In fact, had I went with a cheaper motherboard, 8gb of ram, and the stock CPU cooler, this would have easily been a sub $400 build or even sub $350 build.
I had a great time building this computer. To all those who are considering building a computer instead of buying one from a retail store I say... DO IT! It is well worth it considering the knowledge you gain and you'll be able to brag to your friends that you built your computer.
Think you know a better build or have some criticism on my part choices? Drop a comment below and let me know how you really feel...
About the Author:

Nick Santini is a web developer and college student from Louisville, KY. Aside from his work as a web developer, he is also the man behind SANTINI.IO, a blog dedicated to technology, web design/development, self improvement, and more.
Latest Tweet

Nick Santini
@SANTINI_IO
As a Yankees fan, I still always loved to see that knuckleball. If you don’t make it to the hall of fame the baseball world will have made a mistake!
— Nick Santini (@SANTINI_IO) April 16, 2022
06 Jan 2016 15:11:37
The link to the performance comparison isn’t working.
06 Jan 2016 15:24:49
@Guicho The link should be working now. If not you can just go to http://santini.io/blog/craigslist-killer-under-500-gaming-pc-benchmarks